
python深入
python最大的魅力在于各种各样的第三方库让它能够适配几乎所有的应用场景
- 官方文档
- 学习python的各种疑难问题都是因为没有去阅读第一手资料
python类
如果用 C++ 术语来描述的话,类成员(包括数据成员)通常为 public,所有成员函数都为 virtual
super()详解
self详解
由于python没有指针,自然也没有this指针,但又需要像cpp一样,提供一个直接访问类内函数或者变量的方法,所以python引入了关键字self.
事实上,上述的说法是不严谨的:
方法的第一个参数常常被命名为 self。 这也不过就是一个约定: self 这一名称在 Python 中绝对没有特殊含义。 但是要注意,不遵循此约定会使得你的代码对其他 Python 程序员来说缺乏可读性,而且也可以想像一个 类浏览器 程序的编写可能会依赖于这样的约定。
也就是说,我们可以起名叫this,apple,但别人不一定看得懂就是了.
我们可以看到,大多数类中的函数都需要至少给出一个参数,也就是self,即使函数中并没有用到self,原因如下:
- Python 的类实例方法在调用时,解释器会自动将实例对象作为第一个位置参数传入,如果你没有写self参数,那么由于该函数没有参数,但却传入了一个参数,就会报错
- 至于为什么会这样,那就是设计上的问题了,只能被动接受.
- 这也解释了为什么我们从来没有手动处理self参数过
1 | class Dog: |
关键字与内置函数
with
is和is not
yield
try finally catch throw
async与await
- 于2015年的python3.5引入
assert
1 | assert expression |
报错后输出提示
1 | import sys |
常用语法糖
@classmethod
Transform a method into a class method.
字面意思,将某个方法实例化到这个类中,从而可以直接调用,不需要使用self来指向实例,也不需要进行类的实例化.
但仍然需要填入参数cls(自然可以叫别的名字,cls只是一个习惯上的写法),用来指向这个类
- 因为这个类还没完成,就不能用类名.var/method来调用类内变量和函数,故需要通过cls来指向该类.
1 | class A(object): |
@property
Return a property attribute.
A property object has getter, setter, and deleter methods usable as decorators that create a copy of the property with the corresponding accessor function set to the decorated function. This is best explained with an example:
1 | class C: |
1 | class Parrot: |
- The @property decorator turns the voltage() method into a “getter” for a read-only attribute with the same name, and it sets the docstring for voltage to “Get the current voltage.”
如果还是看不懂的话,就把property看成是一个将方法转换成类内只读属性的语法糖(可以少写一对括号,并且不可修改),但可以通过setter和deleter来修改.
@dataclass
是什么,怎么用
一般来说,我们定义类时需要这么写来初始化:
1 | class CoinTrans: |
自然,python打印类的时候默认是打印类的内存地址的,这需要我们去单独实现一个打印函数返回类中的各种信息.
但如果使用dataclass装饰器的话,可以这样写:
1 | from dataclasses import dataclass |
不需要写__init__,也不需要写打印函数,就可以直接实现上述的效果.
类型注释
类型注释在PEP484中引入,也就是2015年的python3.5,从而在很大程度上解决了python动态类型带来的混乱.
简单的类型注释
如下方代码所示,类型注释有两种格式:
变量名: 类型: 用于提示参数的类型函数末尾 -> 类型:: 用于提示函数的返回值类型
1 | def surface_area_of_cube(edge_length: float) -> str: |
大多数类型注释都不需要导入任何库即可使用,下面是一个常用的系统直接支持的类型注释表格:
| 分类 | 语法示例 | 说明 | 适用版本 |
|---|---|---|---|
| 基础标量 | var: int, var: float, var: bool, var: str, var: bytes |
整数、浮点、布尔、字符串、字节流 | 全版本 |
| 空值/无返回 | def fn() -> None: |
表示函数没有返回值 | 全版本 |
| 列表 | var: list[int] |
元素全为整数的列表 | 3.9+ |
| 字典 | var: dict[str, int] |
键为字符串、值为整数的字典 | 3.9+ |
| 元组 (定长) | var: tuple[int, str] |
包含一个整数和一个字符串的二元组 | 3.9+ |
| 元组 (变长) | var: tuple[int, ...] |
包含任意数量整数的元组 | 3.9+ |
| 集合 | var: set[str] |
元素全为字符串的集合 | 3.9+ |
| 联合类型 | var: int | str |
变量可以是整数或字符串 (Union) | 3.10+ |
| 可选类型 | var: str | None |
变量可以是字符串或为空 (Optional) | 3.10+ |
| 类对象 | var: type[MyClass] |
变量是类本身,而不是类的实例 | 3.9+ |
| 自定义类 | var: MyClass |
变量是该类的实例 | 全版本 |
| 双向队列 | var: collections.deque[int] |
需 Python 3.9+,虽在 collections 但无需 import typing | 3.9+ |
| 切片 | var: slice |
内存索引切片对象 | 全版本 |
| 范围 | var: range |
迭代范围对象 | 全版本 |
| 枚举迭代 | var: enumerate |
枚举对象 | 全版本 |
这些简单类型已经可以涵盖大多数应用场景了,如果需要使用更高级的类型注释功能,就需要导入typing库来使用.
typing系统库
类型别名: type
类型别名是使用 type 简写 = 复杂类型 语句来定义的,它将创建一个 TypeAliasType 的实例.
1 | type Vector = list[float] |
Any: 支持任何类型
不使用类型注释时,所有的变量和返回值都被视为Any,用Any类型注解的变量不会在类型检查时报错.
在现代python项目中,有三种情况会用到它:
- 某一个变量支持不同类型的值
- 你不知道它应该是什么值
- 无论它是什么值都无所谓
显然,如果你全用Any的话也可以通过类型检查,但这样就没有意义了.
格式检查
ruff
是什么,怎么用
ruff是用rust编写的python格式检查库,可以迅速将py文件规范化,速度比一版的格式检查库都要快很多.
要使用ruff,我们需要先将它加入到当前项目中:
1 | uv add --dev ruff |
之后再运行以下命令就可以检查该项目是否规范
1 | uv run ruff check |
基本用法
ruff check
1 | ruff check # Lint files in the current directory. |
测试
如何写测试
- pytest文档
- 写的很好,所以全文摘录
In the simplest terms, a test is meant to look at the result of a particular behavior, and make sure that result aligns with what you would expect. Behavior is not something that can be empirically measured, which is why writing tests can be challenging.
“Behavior” is the way in which some system acts in response to a particular situation and/or stimuli. But exactly how or why something is done is not quite as important as what was done.
You can think of a test as being broken down into four steps:
- Arrange
- Act
- Assert
- Cleanup
Arrange is where we prepare everything for our test. This means pretty much everything except for the “act”. It’s lining up the dominoes so that the act can do its thing in one, state-changing step. This can mean preparing objects, starting/killing services, entering records into a database, or even things like defining a URL to query, generating some credentials for a user that doesn’t exist yet, or just waiting for some process to finish.
Act is the singular, state-changing action that kicks off the behavior we want to test. This behavior is what carries out the changing of the state of the system under test (SUT), and it’s the resulting changed state that we can look at to make a judgement about the behavior. This typically takes the form of a function/method call.
Assert is where we look at that resulting state and check if it looks how we’d expect after the dust has settled. It’s where we gather evidence to say the behavior does or does not align with what we expect. The assert in our test is where we take that measurement/observation and apply our judgement to it. If something should be green, we’d say assert thing == "green".
Cleanup is where the test picks up after itself, so other tests aren’t being accidentally influenced by it.
At its core, the test is ultimately the act and assert steps, with the arrange step only providing the context. Behavior exists between act and assert.
也就是说,在写测试之前,我们需要设计一些能够体现代码功能或者bug的操作,放入测试函数中,然后执行函数并检测输出是否与预期的一致,并保证测试结果彼此之间互不影响.
pytest
Intro
pytest在python测试库中占据了统治地位,而python系统库自带的unittest就显得逊色很多了,故测试库里我只介绍pytest.
我们先创建一个test_parts.py文件,填入以下代码:
1 | def func(x): |
- 如果是全局安装过,或者在虚拟环境安装了的话,只要在终端输入
pytest即可 - 如果使用uv管理的话,只需输入以下命令:
1 | uv run pytest |
该命令将运行当前目录并递归运行子目录中所有形式为 test_*.py 或 *_test.py 的文件.
- 如果文件中的代码块不是全局的而是位于函数中,则需要函数名带有类似的
test_*()格式 - 如果把函数放在类里面,则需要在类名前面加上
Test,否则该类被整个跳过
来看看输出结果:
1 | ================================= test session starts ================================== |
- [100%] 指的是运行所有测试用例的总体进度
使用pytest语法糖
用@pytest.fixture()修饰的函数在文件内部可以直接被其他函数调用名字并获取返回值,具体如下所示:
1 | import pytest |
- login()在这里相当于一个测试工具函数
语法糖参数: autouse
默认情况下,被@pytest.fixture()修饰的工具函数只在被请求时才被加载,如果没有任何一个测试用例用到这个函数,它就永远不会运行,也就是懒加载(lazy loading).
乍一看挺好的,但是如果测试中有大量的测试用例更改了数据库,我们不希望一个个去撤销数据库更改后还原,不仅让代码变得臃肿,而且很累.
所以,我们使用autouse=True来让被修饰的函数强制生效,而不管测试用例有没有调用这个函数.
1 | import pytest |
终端输出
1 | 登录... |
语法糖参数: scope
fixture作用范围可以为module、class、session和function,默认作用域为function。
其核心逻辑是:在指定作用域内,只执行一次初始化,然后所有人共享这个缓存的对象。
function(函数级)
- 频率:最高。
- 含义:每个测试函数执行前,都会重新运行一遍 Fixture。
- 场景:你需要每个测试用例都拥有一个全新的、干净的数据副本,防止 A 用例的操作影响到 B 用例。
class(类级)
- 频率:中。
- 含义:如果一个测试类(
class TestXXX)里有 10 个测试方法,这个 Fixture 只会在进入该类时运行一次,10 个方法共用同一个对象。 - 场景:测试类中的所有方法都需要同一个昂贵的对象(如一个已经打开的浏览器窗口)。
module(模块级)
- 频率:低。
- 含义:在一个
.py文件中,无论有多少个类或函数,Fixture 只在该文件开始时运行一次。 - 场景:同一个文件内的测试都依赖于同一个外部配置函数。
session(会话级)
- 频率:最低。
- 含义:当你运行
pytest命令开始,到所有测试结束,Fixture 只运行一次。 - 场景:启动整个项目的测试数据库、初始化大型算法模型或全局 API 客户端。
yield关键字在pytest中的使用
在yield关键字之前的代码在测试函数开始运行之前执行,yield之后的代码在函数运行结束后执行
1 | import pytest |
终端输出
1 | PASSED [ 33%] |
conftest.py文件
自动识别机制
只要文件名为 conftest.py,pytest 会在启动时自动扫描并加载它。你不需要在测试文件中显式 import 它。
作用范围(层级继承)
conftest.py 的作用范围遵循目录树结构:
- 根目录:如果放在项目根目录,其定义的配置对整个项目生效。
- 子目录:如果放在某个子目录(如
tests/unit/conftest.py),则仅对该目录及其子目录下的测试文件生效。 - 优先级:子目录中的
conftest.py会重写或扩展父目录中的同名配置。
核心用途
它本质上是一个本地插件库,主要处理以下三类任务:
- Fixtures(固件)共享:
在conftest.py中定义的@pytest.fixture可以被该目录下的所有测试用例直接通过参数名调用,不用再进行导入 - Hook函数自定义:
可以修改 pytest 的内部行为。例如pytest_runtest_setup(在测试开始前执行)或pytest_addoption(添加自定义命令行参数)。 - 外部插件加载:
通过pytest_plugins = ["plugin1", "plugin2"]在特定目录下引入额外的插件。
关键限制
- 不可跨目录手动导入:永远不要尝试
from conftest import ...。如果这样做,会破坏 pytest 的加载机制,可能导致配置冲突或重复初始化。 - 文件命名固定:必须严格命名为
conftest.py,否则 pytest 会将其视为普通的 Python 模块
实战
事实上,上述的内容基本涵盖了我们所需的pytest知识了,我们现在拿fastapi模板项目中的test部分来做例子,深入探讨一下pytest的实际应用
- 看来我这个博客可以靠着fastapi啃很久了
先翻到后端的Readme:
If your stack is already up and you just want to run the tests, you can use:
1 | docker compose exec backend bash scripts/tests-start.sh |
看来这就是测试脚本了,让我们看看tests-start.sh的内容:
1 |
|
那我们再看看test.sh脚本
1 |
|
也就是说,到头来还是用pytest执行了tests文件夹里的测试,只不过多了一些其他的包装而已.
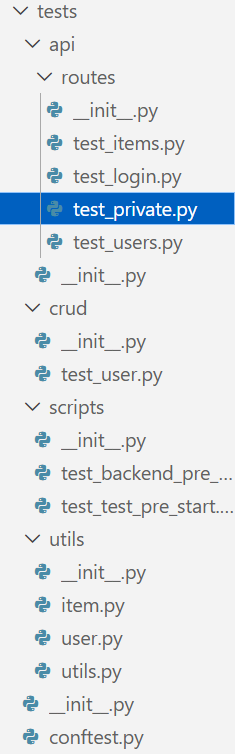
- 这就是全部的测试文件了,还是很多的,这说明测试并非是无关轻重的代码部分
先来看看最外层的conftest.py文件:
conftest.py
1 | from collections.abc import Generator |
第一个函数db在整个测试开始时启动一次,将数据库初始化,并删除Item和User关系表,从而清空所有数据;至于其他被注释掉的函数都是给其他测试模块用的工具函数
- 换句话说,这个测试只能在开发环境做,一旦部署好了就不要再搞测试了
除了utils文件夹下的文件都是工具函数外,其余的文件基本都是以test_前缀打头的pytest文件了.我们只挑一个最精华的文件来看:
test_items.py
1 | import uuid |
- 第一个函数
test_create_item模拟管理员创建一个测试数据,并判断收到的响应报文中的数据是否相同. - 第二个函数
test_read_item模拟管理员在创建一个随机物品后,判断使用get请求是否正常. - 第三个函数
test_read_item_not_found模拟管理员直接访问一个不存在的物品,需要注意的是,这里的uuid4方法有可能产生恰好与之前测试生成相同的物品id,而我们的数据库清空是只在开始运行时执行,而不是每次执行测试函数都执行,因此有极低的概率会返回200状态码导致测试失败
后面的函数都大差不差了,基本就是构造测试数据,使用client模拟前端进行访问,并判断响应是否正常,但是有一个问题:既然要模拟前端访问,自然需要后端能够响应,才能执行测试,但根据前面的脚本分析,我们仅仅是用了pytest启动test文件夹中的测试而已,并没有真正的启动后端,那么测试是如何执行的呢?
答案在最开始的conftest.py中,我们的测试函数中都引入了client: TestClient这个工具函数,而这个函数在conftest.py中早就定义好了:
1 | from app.main import app |
这里的TestClient方法的作用域为模块级,即只在该文件的测试开始执行时调用一次,使用了main.py中的app对象:
1 | # 真实后端里的main.py |
也就是说,我们启动了后端中的关键部分,从而实现对后端的整体调用,测试整个应用的运行是否正常.