Java历史
之所以把Java历史摆在最前面,是因为我们需要知道Java的生态为何如此混乱.
- 1991年06月:项目启动
James Gosling、Mike Sheridan 与 Patrick Naughton 发起 Java 语言项目,最初命名为 Oak,随后曾更名为 Green,最终定名为 Java。
- 1996年:正式发布
Sun Microsystems 发布 Java 1.0 实现。该版本确立了“一次编写,到处运行”(WORA)的核心理念,并因其安全特性和浏览器对 Java Applet 的支持迅速普及。
- 1997年:标准化博弈
Sun 曾尝试通过 ISO/IEC JTC 1 和 Ecma International 推动 Java 标准化,但随后撤出,转而通过 Java Community Process (JCP) 维持事实上的标准控制。
- 1998年12月:架构分化
Java 2 (J2SE 1.2) 发布。Java 体系被正式划分为三个方向:面向企业级的 J2EE、面向桌面的 J2SE 以及面向移动设备的 J2ME。
- 2006年:更名与开源启动
出于市场营销考虑,Sun 将版本重新命名为 Java EE、Java SE 和 Java ME。同年 11 月,Sun 开始基于 GPL-2.0 协议发布 JVM 开源软件。
- 2007年:完成开源
除了极少数不持有版权的代码外,Sun 完成了 JVM 核心代码的开源分发。
- 2009年-2010年:所有权更迭
Oracle 收购 Sun Microsystems。随后不久,Oracle 就 Android SDK 中使用 Java 的问题对 Google 发起诉讼。
- 2010年04月:核心人物离职
Java 之父 James Gosling 从 Oracle 辞职。
- 2016年01月:淘汰过时技术
Oracle 宣布从 JDK 9 开始,Java 运行时环境将停止支持浏览器插件。
环境配置
编译器下载
与Cpp运行需要MSVC等编译器,python运行需要python虚拟环境一样,Java运行需要的是JDK(Java Development Kit).
如前面所说,尽管Java版权归Oracle公司所有,但也有开源的社区版本和基于开源版本制作的第三方JDK,性能上的差别非常小.
为了省事,我们直接上微软官网下载JDK21即可,这样可以跳过烦人的环境变量配置环节.
- 至于为什么不选最新的25版本是因为体积更大也没必要.
配置环境变量(可跳过)
与cpp类似,如果不配置编译器的环境变量的话,系统是无法识别你的命令的:
1
2
3
4
5
6
7
8
| java --version
java : 无法将“java”项识别为 cmdlet、函数、脚本文件或可运行程序的名称。请检查名称的拼写,如果包括路径,请确保路径正确
,然后再试一次。
所在位置 行:1 字符: 1
+ java --version
+ ~~~~
+ CategoryInfo : ObjectNotFound: (java:String) [], CommandNotFoundException
+ FullyQualifiedErrorId : CommandNotFoundException
|
但是,如果你用的是微软的OpenJDK,就可以在安装的时候勾选配置环境变量直接跳过这一步:
1
2
3
4
| java --version
openjdk 21.0.10 2026-01-20 LTS
OpenJDK Runtime Environment Microsoft-13106404 (build 21.0.10+7-LTS)
OpenJDK 64-Bit Server VM Microsoft-13106404 (build 21.0.10+7-LTS, mixed mode, sharing)
|
但如果你铁着头选择了Oracle官方版本的话,那么还是需要自己配置的…预先警告这很麻烦
VScode配置Java环境
当你第一次创建.java文件时,VScode会自动为你推荐所需的扩展并配置好环境,所以无需额外操作.
Java基础学习
- W3schools
- 不要看廖雪峰教程…写的并不是很好,而且很枯燥,搞不懂为什么流量这么大.
- 建议先学好cpp后再学Java,本部分经常会拿cpp来跟Java做比较
基础语法
学习前的要点
我们首先需要知道JAVA的面向对象特性:
- 所有函数和变量都写在类里面,因此函数都变成了
方法,变量都变成了属性 - 如果源文件中包含public类,则文件名必须与该类名完全一致
- 所有的类名都需要大写,仅是一种规范,但最好大写.
例如:
1
2
3
4
5
| public class Main {
public static void main(String[] args) {
System.out.println("Hello World");
}
}
|
包含了这个代码的文件必须叫做Main.java,区分大小写.
主函数
上述代码中的main函数是Java程序的入口,其作用与c/cpp中的main函数别无二致:
1
2
3
| public static void main(String[] args) {
System.out.println("Hello World");
}
|
如果你不觉得main函数里的String[] args参数很奇怪的话,那我就觉得你很奇怪了.
这个参数作为命令行交互的接收器,尽管你未必会显式用到这个参数,但是必须要写上.
尽管从Java21开始允许不写这个参数了,但是很多企业内部的数据库交互用的依然是Java8…所以还是写上比较好
- 很难想象这么一个简单的修改需要经过将近三十年的考量…Java生态的陈旧性可见一斑
变量类型
1
2
3
4
5
6
7
| // 常用变量类型
int myNum = 5;
float myFloatNum = 5.99f;
double myDoubleNum = 3.14159;
char myLetter = 'D';
boolean myBool = true;
String myText = "Hello";
|
值得注意的是唯独String这个变量类型是大写的,因为它是一个类,如前面所说,Java中的类名都需要大写,所以这里就大写了.
Java 10(2018年发布)引入了类似于cpp中auto的变量类型var:
1
2
| var x = 5; // x is an int
System.out.println(x);
|
与auto一样,var不允许只声明不赋值:
1
2
| var x; // Error
var x = 5; // OK
|
Java数组
由于cpp反直觉的类似int a[10]这样的语法,所以Java将声明时的[]优化到了变量名前面,变成了这样:
1
2
3
| String[] cars = {"Volvo", "BMW", "Ford", "Mazda"};
System.out.println(cars[0]);
// Outputs Volvo
|
- 尽管其他特性没什么改变,但看上去顺眼多了,毕竟我们都说
int 数组a,而不会说int a数组
二维数组
自然,如果是二维数组,就要写两个[]了:
1
2
3
4
5
6
7
| int[][] myNumbers = { {1, 4, 2}, {3, 6, 8, 5, 2} };
for (int row = 0; row < myNumbers.length; row++) {
for (int col = 0; col < myNumbers[row].length; col++) {
System.out.println("myNumbers[" + row + "][" + col + "] = " + myNumbers[row][col]);
}
}
|
Java的for-each循环
由于Java的大多数逻辑语句和cpp别无二致,因此全都略过,但值得一提的是下面这个语法:
1
2
3
4
5
| String[] cars = {"Volvo", "BMW", "Ford", "Mazda"};
for (String car : cars) {
System.out.println(car);
}
|
这被称为for-each循环,于04年的Java5.0引入,而cpp直到c++11才正式引入:
1
2
3
4
5
| std::vector<std::string> cars = {"Volvo", "BMW", "Ford", "Mazda"};
for (const std::string& car : cars) {
std::cout << car << std::endl;
}
|
OOP
修饰符
先概览一下Java中的常用修饰符,之后会逐渐根据代码理解的
类修饰符 (Class Modifiers)
在 Java 中,类修饰符决定了类的访问权限、继承特性以及实例化规则。
| 修饰符 | 描述 | 适用范围 |
|---|
| public | 最宽泛的访问级别。该类对所有类可见。 | 顶级类、内部类 |
| protected | 对同一包内的类及所有子类可见。 | 仅内部类 |
| default | (不写关键字) 仅对同一包内的类可见。 | 顶级类、内部类 |
| private | 仅对定义它的外部类可见。 | 仅内部类 |
| abstract | 抽象类。不能被实例化,必须由子类继承并实现其抽象方法。 | 顶级类、内部类 |
| final | 最终类。不能被继承(例如 java.lang.String)。 | 顶级类、内部类 |
| static | 静态内部类。不需要依赖外部类实例即可创建。 | 仅内部类 |
| sealed | 密封类(Java 17+)。限制哪些类可以继承它。 | 顶级类 |
方法修饰符 (Method Modifiers)
方法修饰符控制方法的访问权限、执行逻辑、以及子类覆盖规则。
访问控制修饰符
- public: 方法对所有类可见。
- protected: 方法对同一包内的类及所有子类可见。
- default: (不写关键字) 仅对同一包内的类可见。
- private: 仅在当前类内部可见。
非访问控制修饰符
- static: 静态方法。属于类而非实例,通过类名直接调用,不能访问非静态成员。
- final: 最终方法。子类可以继承但不能覆盖(Override)此方法。
- abstract: 抽象方法。没有方法体,必须由非抽象子类实现。
static修饰符详解
首先我们需要知道一件事:尽管Java强制要求所有方法都写在类中,但是有一些方法我们并不想让它与某个类的实例有任何关系,也就是说,我们想要像cpp定义全局函数那样,直接在类内方法中调用该函数,而不需要带上类访问符.,那么就可以用static关键字来修饰某个方法:
 1
 2
 3
 4
 5
 6
 7
 8
 9
10
11
| public class Main {
static void myMethod() {
System.out.println("Hello World!");
}
public static void main(String[] args) {
myMethod();
}
}
// Outputs "Hello World!"
|
- 这里我们直接调用了
myMethod方法而不需要通过this指针或者类访问符来操作它
总结一下就是说,Java的static方法属于这个类,类外访问时通过类名.方法调用,类内访问可以直呼其名,而非static方法属于类实例,需要先实例化一个类后再通过实例调用.
创建类实例
Java创建类实例的方法有很多,但最常用的还是通过new操作符:
1
2
3
4
5
6
7
8
| public class Main {
int x = 5;
public static void main(String[] args) {
Main myObj = new Main();
System.out.println(myObj.x);
}
}
|
由于Java的垃圾回收机制(很后面会提到),我们不用像在cpp中一样,new一个对象后就要使用delete操作符删除它,还是很便利的.
构造函数
与Java有new没有delete同理,Java有构造函数但没有析构函数,构造函数的写法与cpp的写法相同:与类同名
 1
 2
 3
 4
 5
 6
 7
 8
 9
10
11
12
13
14
| public class Main {
int x;
public Main(int y) {
x = y;
}
public static void main(String[] args) {
Main myObj = new Main(5);
System.out.println(myObj.x);
}
}
// Outputs 5
|
this引用符
由于Java不再显式使用指针,但又需要像cpp一样用某个符号代指类实例,否则无法通过类内方法访问私有属性.
因此,Java引入了this引用符,用来指向当前的类实例:
 1
 2
 3
 4
 5
 6
 7
 8
 9
10
11
12
13
14
| public class Main {
int x; // Class variable x
// Constructor with one parameter x
public Main(int x) {
this.x = x; // refers to the class variable x
}
public static void main(String[] args) {
// Create an object of Main and pass the value 5 to the constructor
Main myObj = new Main(5);
System.out.println("Value of x = " + myObj.x);
}
}
|
- 这与Python中的self有异曲同工之处,但不同的是self需要显示声明,而Java的this与cpp的this一样都是隐式存在的
构造函数的重载
 1
 2
 3
 4
 5
 6
 7
 8
 9
10
11
12
13
14
15
16
17
18
19
20
21
22
23
24
25
26
27
28
29
30
31
32
33
| public class Main {
int modelYear;
String modelName;
// Constructor with one parameter
public Main(String modelName) {
// Call the two-parameter constructor to reuse code and set a default year
this(2020, modelName);
}
// Constructor with two parameters
public Main(int modelYear, String modelName) {
// Use 'this' to assign values to the class variables
this.modelYear = modelYear;
this.modelName = modelName;
}
// Method to print car information
public void printInfo() {
System.out.println(modelYear + " " + modelName);
}
public static void main(String[] args) {
// Create a car with only model name (uses default year)
Main car1 = new Main("Corvette");
// Create a car with both model year and name
Main car2 = new Main(1969, "Mustang");
car1.printInfo();
car2.printInfo();
}
}
|
通过构造函数的重载可以实现类的不同初始化数值
非常值得注意
上述代码的this(2020, modelName)并非是简单的语法糖,它指向的是完整版本的构造函数,从而实现代码的复用,换句话说,如果只写这一句而不写完整构造函数就会报错.
1
2
3
4
5
6
7
8
9
| class Main {
public:
int modelYear;
string modelName;
// 使用初始化列表:变量(值)
Main(string name) : modelYear(2020), modelName(name) {
}
}
|
继承与多态
由于cpp中的继承符号:过于简单和抽象,因此Java将继承符号改为了继承关键字extends:
 1
 2
 3
 4
 5
 6
 7
 8
 9
10
11
12
13
14
15
16
17
18
19
20
21
| class Vehicle {
protected String brand = "Ford"; // Vehicle attribute
public void honk() { // Vehicle method
System.out.println("Tuut, tuut!");
}
}
class Car extends Vehicle {
private String modelName = "Mustang"; // Car attribute
public static void main(String[] args) {
// Create a myCar object
Car myCar = new Car();
// Call the honk() method (from the Vehicle class) on the myCar object
myCar.honk();
// Display the value of the brand attribute (from the Vehicle class) and the value of the modelName from the Car class
System.out.println(myCar.brand + " " + myCar.modelName);
}
}
|
final修饰符详解
Java将cpp中的常量修饰符const改成了final,这可不是脱裤子放屁,而是因为Java中的final还可以限制某些类不可被继承:
 1
 2
 3
 4
 5
 6
 7
 8
 9
10
11
| final class Vehicle {
...
}
class Car extends Vehicle {
...
}
// Main.java:9: error: cannot inherit from final Vehicle
// class Main extends Vehicle {
// ^
// 1 error)
|
将类也看做常量的想法确实挺奇妙的,但一般来说根本用不到吧.
多态
Java中的方法默认是可以被重载的,这比起cpp要便利很多,同样,被final修饰的方法只能被继承但不能被重载:
 1
 2
 3
 4
 5
 6
 7
 8
 9
10
11
12
13
14
15
16
17
| class Animal {
public void animalSound() {
System.out.println("The animal makes a sound");
}
}
class Pig extends Animal {
public void animalSound() {
System.out.println("The pig says: wee wee");
}
}
class Dog extends Animal {
public void animalSound() {
System.out.println("The dog says: bow wow");
}
}
|
super引用符
Java设计了super引用符来指向父类:
 1
 2
 3
 4
 5
 6
 7
 8
 9
10
11
12
13
14
15
16
17
18
19
| class Animal {
public void animalSound() {
System.out.println("The animal makes a sound");
}
}
class Dog extends Animal {
public void animalSound() {
super.animalSound(); // Call the parent method
System.out.println("The dog says: bow wow");
}
}
public class Main {
public static void main(String[] args) {
Dog myDog = new Dog();
myDog.animalSound();
}
}
|
当然,super更强大的地方在于能够调用父类的构造函数:
 1
 2
 3
 4
 5
 6
 7
 8
 9
10
11
12
13
14
15
16
17
18
19
20
| class Animal {
Animal() {
System.out.println("Animal is created");
}
}
class Dog extends Animal {
Dog() {
super(); // Call parent constructor
System.out.println("Dog is created");
}
}
public class Main {
public static void main(String[] args) {
Dog myDog = new Dog();
}
}
// Animal is created
// Dog is created
|
这其实很好理解,把super换成父类的类名即可看懂了.
抽象与接口
Java将Cpp中的虚函数与重载机制进一步发扬光大,发明了抽象方法和接口,简单来说的话,抽象类内的抽象方法没有函数内容,而且必须被子类重载实现;而接口就是抽象类的简写版,里面的所有函数和属性默认都要被重载实现.
抽象类和抽象方法
 1
 2
 3
 4
 5
 6
 7
 8
 9
10
11
12
13
14
15
16
17
18
19
20
21
22
23
24
25
| // Abstract class
abstract class Animal {
// Abstract method (does not have a body)
public abstract void animalSound();
// Regular method
public void sleep() {
System.out.println("Zzz");
}
}
// Subclass (inherit from Animal)
class Pig extends Animal {
public void animalSound() {
// The body of animalSound() is provided here
System.out.println("The pig says: wee wee");
}
}
class Main {
public static void main(String[] args) {
Pig myPig = new Pig(); // Create a Pig object
myPig.animalSound();
myPig.sleep();
}
}
|
为了区分抽象类和接口,Java特定设置了接口的继承关键字implements,从而与extends区分开来:
 1
 2
 3
 4
 5
 6
 7
 8
 9
10
11
12
13
14
15
16
17
18
19
20
21
22
23
24
25
| // Interface
interface Animal {
public void animalSound(); // interface method (does not have a body)
public void sleep(); // interface method (does not have a body)
}
// Pig "implements" the Animal interface
class Pig implements Animal {
public void animalSound() {
// The body of animalSound() is provided here
System.out.println("The pig says: wee wee");
}
public void sleep() {
// The body of sleep() is provided here
System.out.println("Zzz");
}
}
class Main {
public static void main(String[] args) {
Pig myPig = new Pig(); // Create a Pig object
myPig.animalSound();
myPig.sleep();
}
}
|
至于为什么Java要单独设置implements关键字,是因为它确实与extends有些许不同,implements后可以跟多个接口,而extends后只可以跟一个父类.
 1
 2
 3
 4
 5
 6
 7
 8
 9
10
11
12
13
14
15
16
17
18
19
20
21
22
23
24
| interface FirstInterface {
public void myMethod(); // interface method
}
interface SecondInterface {
public void myOtherMethod(); // interface method
}
class DemoClass implements FirstInterface, SecondInterface {
public void myMethod() {
System.out.println("Some text..");
}
public void myOtherMethod() {
System.out.println("Some other text...");
}
}
class Main {
public static void main(String[] args) {
DemoClass myObj = new DemoClass();
myObj.myMethod();
myObj.myOtherMethod();
}
}
|
Java高级特性
说是高级,其实都很简单,都怪营销号和垃圾博客把Java渲染的多么复杂高深,比起Cpp来说,Java简直不能再简单了.
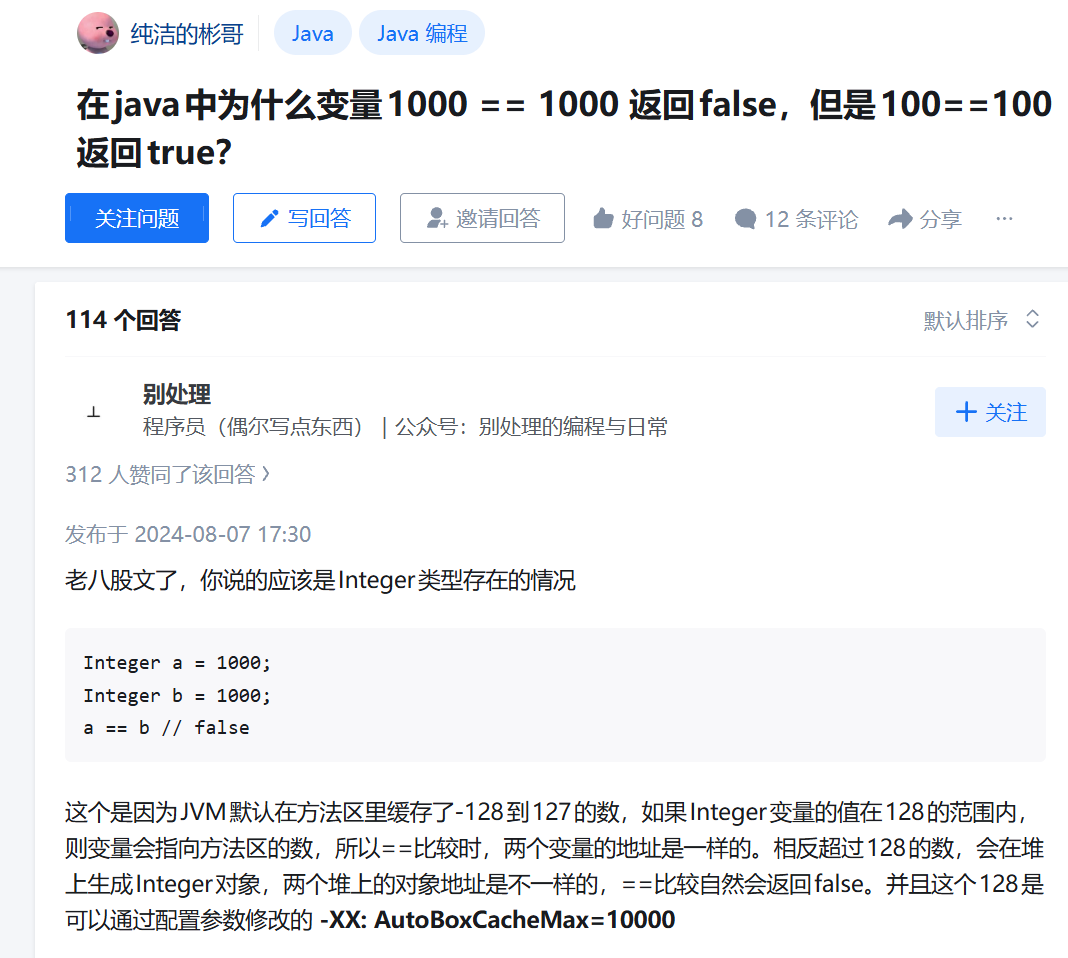
Wrapper Classes(封装类)
| Primitive Data Type | Wrapper Class |
|---|
| byte | Byte |
| short | Short |
| int | Integer |
| long | Long |
| float | Float |
| double | Double |
| boolean | Boolean |
| char | Character |
由于Java内置的数据结构如ArrayList只能存储对象,所以我们需要将数据类型包装成一个数据类来处理:
 1
 2
 3
 4
 5
 6
 7
 8
 9
10
11
12
| import java.util.ArrayList;
public class Main {
public static void main(String[] args) {
ArrayList<String> cars = new ArrayList<String>();
cars.add("Volvo");
cars.add("BMW");
cars.add("Ford");
cars.add("Mazda");
System.out.println(cars);
}
}
|
- 自然,这种脱裤子放屁的事情在Java中还有很多…
Java 泛型(generic)
将不同类型的数据统一处理
 1
 2
 3
 4
 5
 6
 7
 8
 9
10
11
12
13
14
15
16
17
18
19
20
21
22
23
24
25
| class Box<T> {
T value; // T is a placeholder for any data type
void set(T value) {
this.value = value;
}
T get() {
return value;
}
}
public class Main {
public static void main(String[] args) {
// Create a Box to hold a String
Box<String> stringBox = new Box<>();
stringBox.set("Hello");
System.out.println("Value: " + stringBox.get());
// Create a Box to hold an Integer
Box<Integer> intBox = new Box<>();
intBox.set(50);
System.out.println("Value: " + intBox.get());
}
}
|
处理不同的数据输入
 1
 2
 3
 4
 5
 6
 7
 8
 9
10
11
12
13
14
15
16
17
18
19
20
| public class Main {
// Generic method: works with any type T
public static <T> void printArray(T[] array) {
for (T item : array) {
System.out.println(item);
}
}
public static void main(String[] args) {
// Array of Strings
String[] names = {"Jenny", "Liam"};
// Array of Integers
Integer[] numbers = {1, 2, 3};
// Call the generic method with both arrays
printArray(names);
printArray(numbers);
}
}
|
Java Annotations(Java注解)
Annotations are special notes you add to your Java code. They start with the @ symbol.
注解并不会改变程序的运行方式,但是会为编译器和构建工具提供额外的信息,这与Python中的语法糖完全不同.
最常用的注解有三个:
@Override: Indicates that a method overrides a method in a superclass@Deprecated: Marks a method or class as outdated or discouraged from use@SuppressWarnings: Tells the compiler to ignore certain warnings
Java多线程
Java中有两种方法可以创建进程:
 1
 2
 3
 4
 5
 6
 7
 8
 9
10
11
12
| // 1.继承Thread系统类
public class Main extends Thread {
public void run() {
System.out.println("This code is running in a thread");
}
}
// 2.实现Runnable接口,更推荐
public class Main implements Runnable {
public void run() {
System.out.println("This code is running in a thread");
}
}
|
真正要详细了解多线程需要在后面的Java线程池中学习
Java Lambda函数
基本格式
1
| (parameters) -> { body }
|
(parameters):类似于方法的参数列表。如果没有参数,直接写 ();如果只有一个参数且类型可推导,可以省略圆括号。->:Lambda 运算符,固定写法,代表“传递”或“应用”。{ body }:函数体。如果逻辑只有一行代码,可以省略花括号和 return 关键字。
 1
 2
 3
 4
 5
 6
 7
 8
 9
10
11
12
13
14
15
| import java.util.ArrayList;
import java.util.function.Consumer;
public class Main {
public static void main(String[] args) {
ArrayList<Integer> numbers = new ArrayList<Integer>();
numbers.add(5);
numbers.add(9);
numbers.add(8);
numbers.add(1);
Consumer<Integer> method = (n) -> { System.out.println(n); };
numbers.forEach(method);
}
}
|
如果你详细看上述代码的话,你会看到一个神奇的地方,
method类竟然和一个匿名函数用等号连接起来了:
1
| Consumer<Integer> method = (n) -> { ... };
|
这个特性就引出了Java的函数式接口特性,该特性由Java 8引入,属于比较高级的特性,故放在后面讲
Java系统库
随便看看即可,用上的时候再去详细了解
Java文件读写
The File class from the java.io package, allows us to work with files:
1
2
3
| import java.io.File; // Import the File class
File myObj = new File("filename.txt"); // Specify the filename
|
创建文件
 1
 2
 3
 4
 5
 6
 7
 8
 9
10
11
12
13
14
15
16
17
18
| import java.io.File; // Import the File class
import java.io.IOException; // Import IOException to handle errors
public class CreateFile {
public static void main(String[] args) {
try {
File myObj = new File("filename.txt"); // Create File object
if (myObj.createNewFile()) { // Try to create the file
System.out.println("File created: " + myObj.getName());
} else {
System.out.println("File already exists.");
}
} catch (IOException e) {
System.out.println("An error occurred.");
e.printStackTrace(); // Print error details
}
}
}
|
写入文件
 1
 2
 3
 4
 5
 6
 7
 8
 9
10
11
12
13
14
15
16
| import java.io.FileWriter; // Import the FileWriter class
import java.io.IOException; // Import the IOException class
public class WriteToFile {
public static void main(String[] args) {
try {
FileWriter myWriter = new FileWriter("filename.txt");
myWriter.write("Files in Java might be tricky, but it is fun enough!");
myWriter.close(); // must close manually
System.out.println("Successfully wrote to the file.");
} catch (IOException e) {
System.out.println("An error occurred.");
e.printStackTrace();
}
}
}
|
读取文件
 1
 2
 3
 4
 5
 6
 7
 8
 9
10
11
12
13
14
15
16
17
18
19
20
| import java.io.File; // Import the File class
import java.io.FileNotFoundException; // Import this class to handle errors
import java.util.Scanner; // Import the Scanner class to read text files
public class ReadFile {
public static void main(String[] args) {
File myObj = new File("filename.txt");
// try-with-resources: Scanner will be closed automatically
try (Scanner myReader = new Scanner(myObj)) {
while (myReader.hasNextLine()) {
String data = myReader.nextLine();
System.out.println(data);
}
} catch (FileNotFoundException e) {
System.out.println("An error occurred.");
e.printStackTrace();
}
}
}
|
Java I/O
读缓冲区
 1
 2
 3
 4
 5
 6
 7
 8
 9
10
11
12
13
14
15
16
| import java.io.BufferedReader;
import java.io.FileReader;
import java.io.IOException;
public class Main {
public static void main(String[] args) {
try (BufferedReader br = new BufferedReader(new FileReader("filename.txt"))) {
String line;
while ((line = br.readLine()) != null) {
System.out.println(line);
}
} catch (IOException e) {
System.out.println("Error reading file.");
}
}
}
|
写缓冲区
 1
 2
 3
 4
 5
 6
 7
 8
 9
10
11
12
13
14
15
16
| import java.io.BufferedWriter;
import java.io.FileWriter;
import java.io.IOException;
public class Main {
public static void main(String[] args) {
try (BufferedWriter bw = new BufferedWriter(new FileWriter("filename.txt"))) {
bw.write("First line");
bw.newLine(); // add line break
bw.write("Second line");
System.out.println("Successfully wrote to the file.");
} catch (IOException e) {
System.out.println("Error writing file.");
}
}
}
|
Java数据结构
最常用的数据结构都被包装到java.util包中了:
这三个数据结构同样也是Java岗面试的必考点,尽管不太看得出来考的必要
快速对照表
| Java 数据结构 | C++ (STL) 对照 | 底层实现 | 排序性 |
|---|
| ArrayList | std::vector | 动态数组 | 插入顺序 |
| HashSet | std::unordered_set | 哈希表 | 无序 |
| HashMap | std::unordered_map | 哈希表 | 无序 |
| TreeSet | std::set | 红黑树 | 自动排序 |
| TreeMap | std::map | 红黑树 | 自动排序 |
Java进阶学习
Java编译与构建
学习完OOP后,我们很自然的会将不同功能的类拆分到不同java文件中,那么接下来就来看看Java是如何编译和构建不同文件的
JVM
Java8新特性
函数式接口
Java构建工具
与Cpp有Make,ninja,CMake类似,Java也有自己的构建工具,早期的构建工具为Ant,目前由Maven和Gradle两款工具统治,它俩也同时承担了包管理器的责任.
Maven
Maven历史
1. 概念起源与孵化 (2002 - 2003)
- 2002年:由 Jason van Zyl 创建,最初作为 Apache Turbine 的子项目,旨在解决该项目极其复杂的构建过程。
- 2003年:正式被接纳为 Apache 软件基金会的顶级项目。
2. 标准确立与快速普及 (2004 - 2005)
- 2004年7月 (Version 1.0):第一个里程碑版本发布。确立了“约定优于配置”的核心理念。
- 2005年10月 (Version 2.0):重大架构升级版本。
- 核心贡献:确立了 Maven 中央仓库 (Central Repository) 机制,支持动态下载依赖。
- 插件架构:采用基于插件的架构,使其具备了跨语言构建(如 C/C++)的潜力。
3. 架构优化与并行化 (2010)
- 2010年10月 (Version 3.0):
- 解耦与兼容:在保持与 2.x 项目兼容的同时,重构了核心项目构建器。
- 性能提升:引入并行构建特性,能够利用多核 CPU 处理大型多模块项目。
- 非 XML 尝试:开始支持非 XML 的项目定义文件(如 Ruby、YAML、Groovy),解耦了内存表示与文件格式。
使用方法
Gradle
Gradle历史
1. 概念孵化与 Groovy 基因 (2007 - 2008)
- 2007年:Hans Dockter 开始构思一种结合 Ant 的灵活性与 Maven 的依赖管理能力的新工具。
- 2008年4月 (Version 0.1):首个版本发布。创始人最初想命名为“Cradle”,但为了使其更具独特性,取 Groovy 语言的首字母 G,更名为 Gradle。其核心特征是使用基于 Groovy 的 DSL 取代繁琐的 XML 配置。
2. 核心架构确立 (2012 - 2014)
- 2012年6月 (Version 1.0):历经四年迭代,首个正式稳定版发布。确立了有向无环图 (DAG) 任务模型,解决了复杂构建流程的编排问题。
- 2013年:Google 宣布 Android Studio 采用 Gradle 作为官方构建系统。这一决策直接将 Gradle 推向了顶级构建工具的地位。
- 2014年7月 (Version 2.0):提升了构建性能,并正式引入了对原生语言(C/C++)构建的初步支持,展示了其跨语言构建的野心。
3. 性能突破与 Kotlin 引入 (2016 - 2018)
- 2016年8月 (Version 3.0):引入 Gradle Daemon(守护进程)并默认开启,极大地缩短了短周期任务的启动时间。
- 2017年6月 (Version 4.0):引入 Build Cache(构建缓存)技术,允许跨机器共享编译产物,大幅减少了大型项目的重复编译时间。
- 2018年11月 (Version 5.0):正式支持 Kotlin DSL。开发者可以使用类型安全的 Kotlin 编写构建脚本,解决了 Groovy 脚本缺乏 IDE 智能补全和编译时检查的痛点。
4. 现代化与大规模构建优化 (2019 - 2025)
- 2021年4月 (Version 7.0):引入 Version Catalogs(版本目录),实现了多项目之间依赖版本的集中管理,正式统一了大型项目的依赖规范。
- 2023年2月 (Version 8.0):针对配置阶段进行了深度优化,支持 Configuration Cache,使得复杂项目的构建配置速度提升数倍。
- 2025年7月 (Version 9.0):最新里程碑版本。进一步强化了云端构建能力和对现代 JDK 特性的深度适配,确立了其在高复杂度、高性能要求构建场景下的统治地位。
使用Docker开发Java